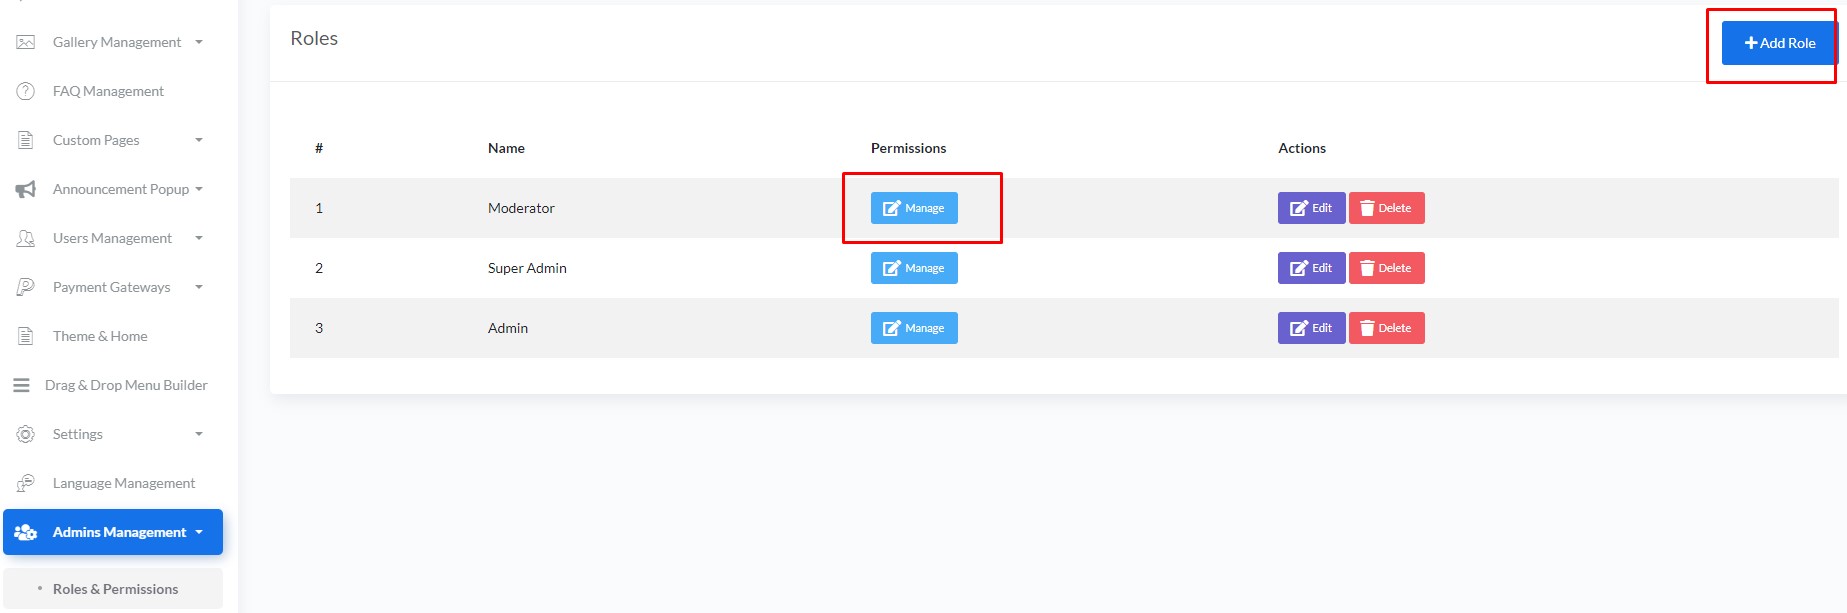
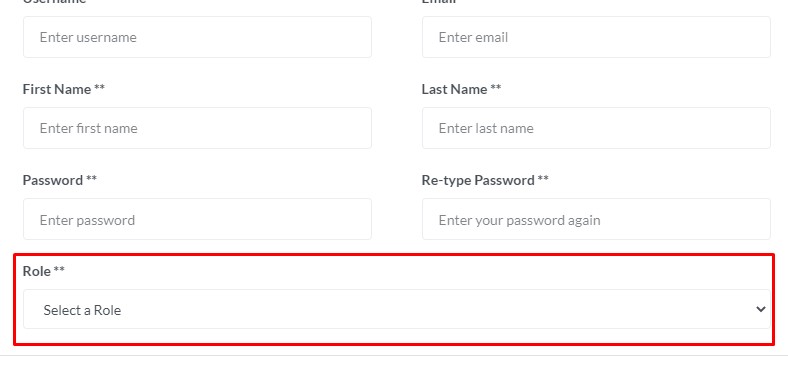
Step 1:How to Connect a Facebook Page with the MessOrder AI User Dashboard
Users need to go to the Facebook Pages menu from the user dashboard and click the
"Connect New Page" button.
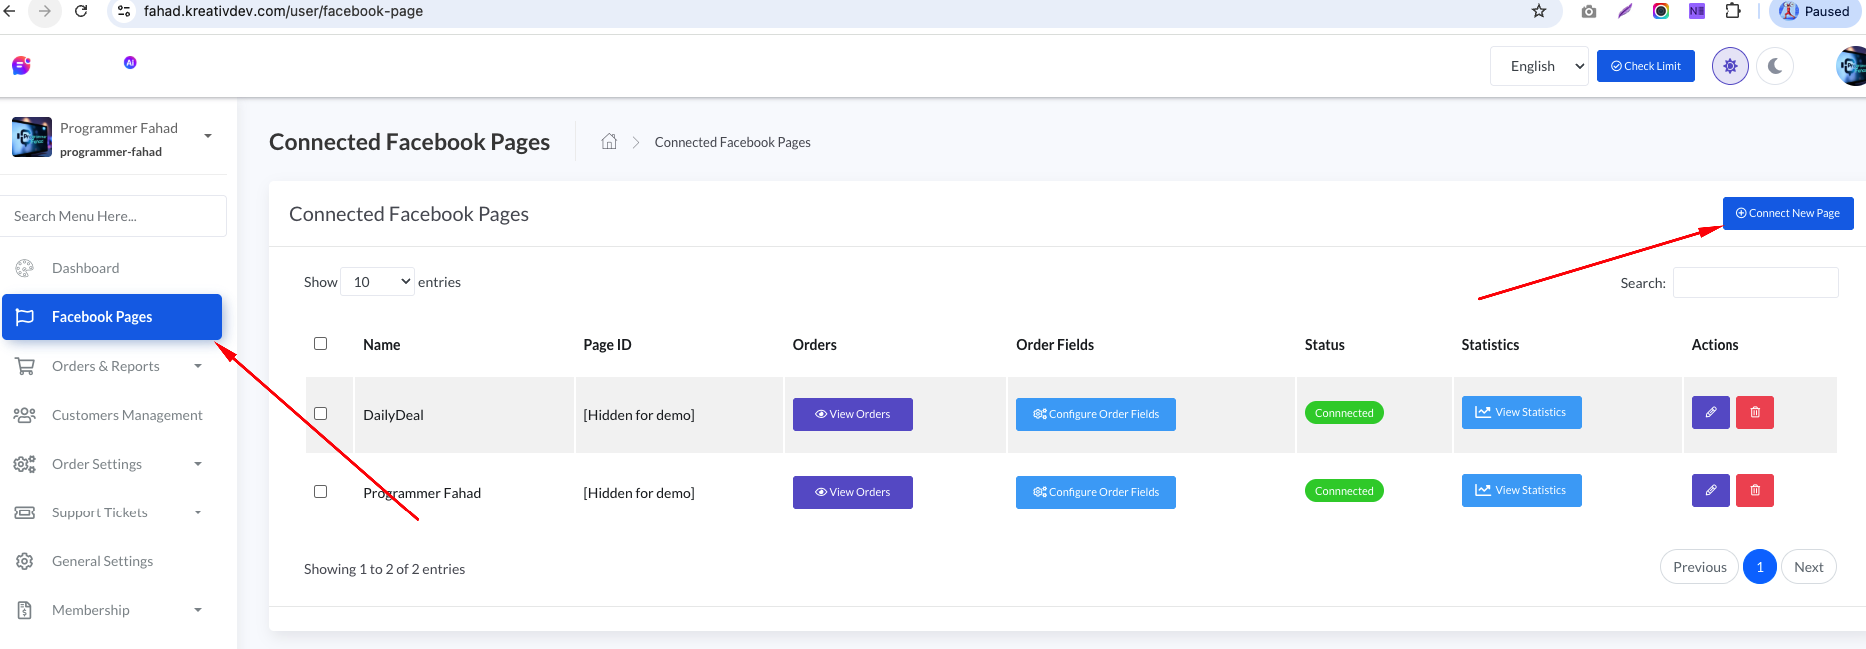
To connect a Facebook page, users must provide the following details in the form:
- Page Name
- Page ID
- Page Access Token
Video Guide to Get These Details (Page Name, Page ID, Page Access Token) & connect Facebook page with User Dashboard:
https://youtu.be/njnUNWJ3go8
Step 2: Publish App (created in Facebook Developer Account):
In this step, you will learn how to publish the app you created in your Facebook Developer account. If your app is not published, the Facebook webhook (which is required to pass Messenger conversations to the MessOrder AI system) will only work for Messenger conversations involving the Facebook page admin’s personal Facebook account and the Facebook page itself. In other words, without publishing the app, the system will only work for testing using the admin’s Facebook profile messages.
However, to make the system work for all Facebook users—meaning any customer who messages your page—you need to publish the app. Once the app is published, the webhook will work for messages from any Facebook user, allowing MessOrder AI to parse conversations and store orders in your dashboard.
To publish your app, follow the video guide: https://youtu.be/H5VqFJyhP48
Step 3: Set Up Product Attributes & Order Details:
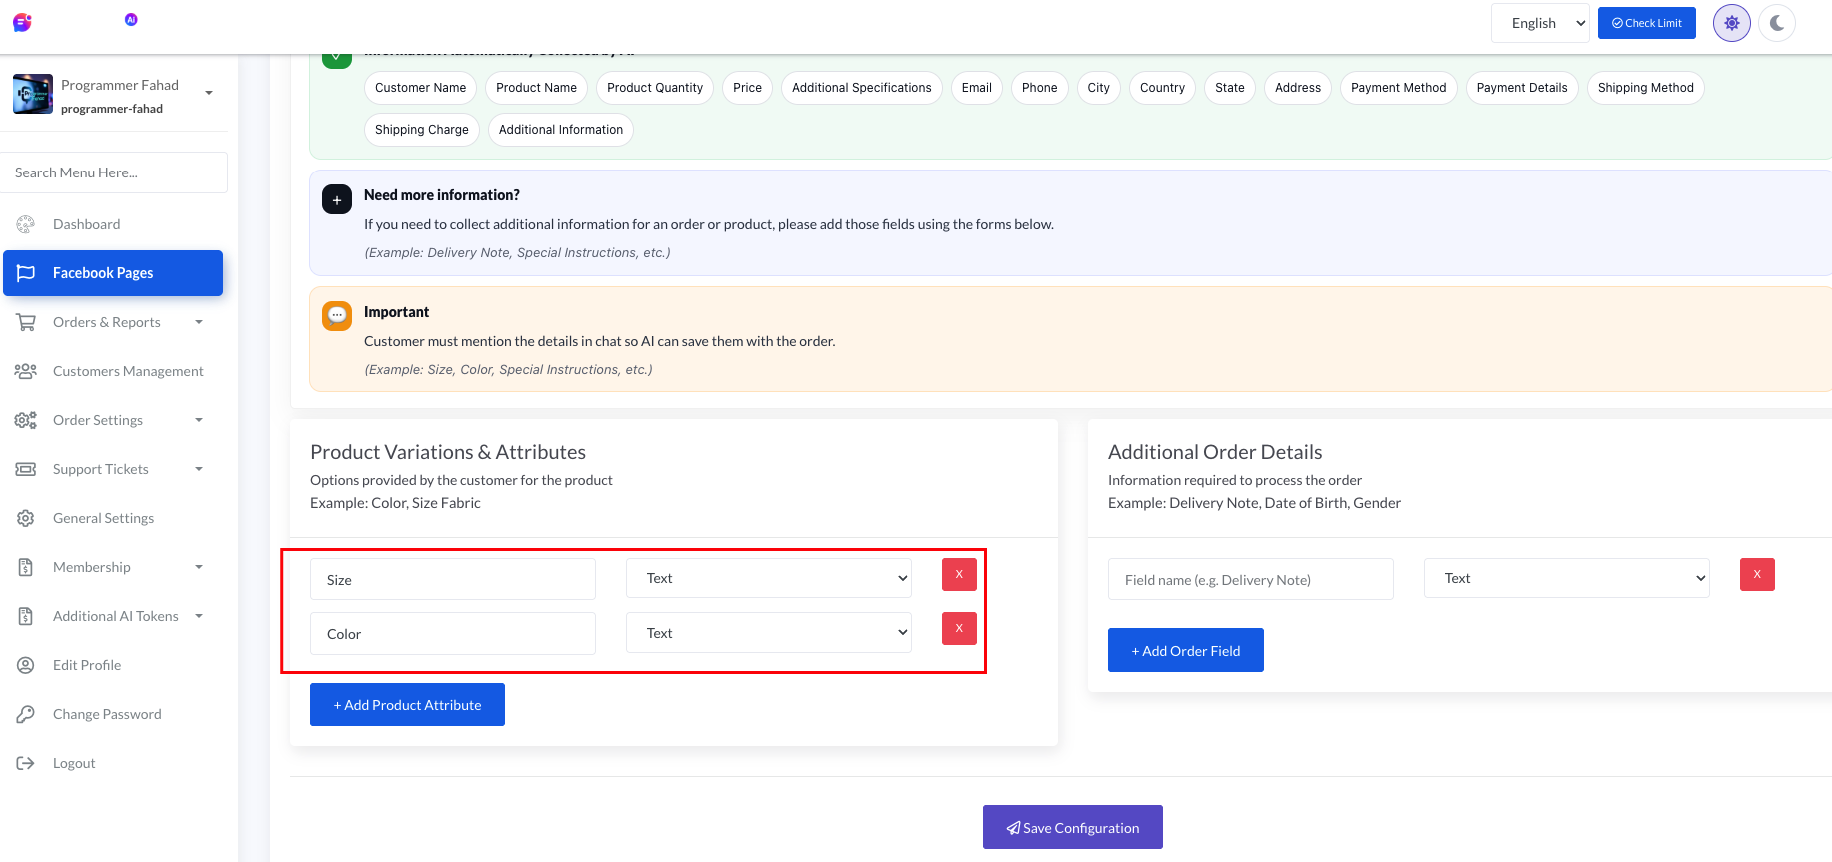
AI will, by default, collect the following information (Customer Name, Product Name, Product Quantity, Price, Additional Specifications, Email, Phone, City, Country, State, Address, Payment Method, Payment Details, Shipping Method, Shipping Charge, Additional Information) from the Messenger conversation.
Users can add product attributes (such as size, color, etc.) for their business by clicking the
Configure Order Fields button on the
Facebook Pages page.
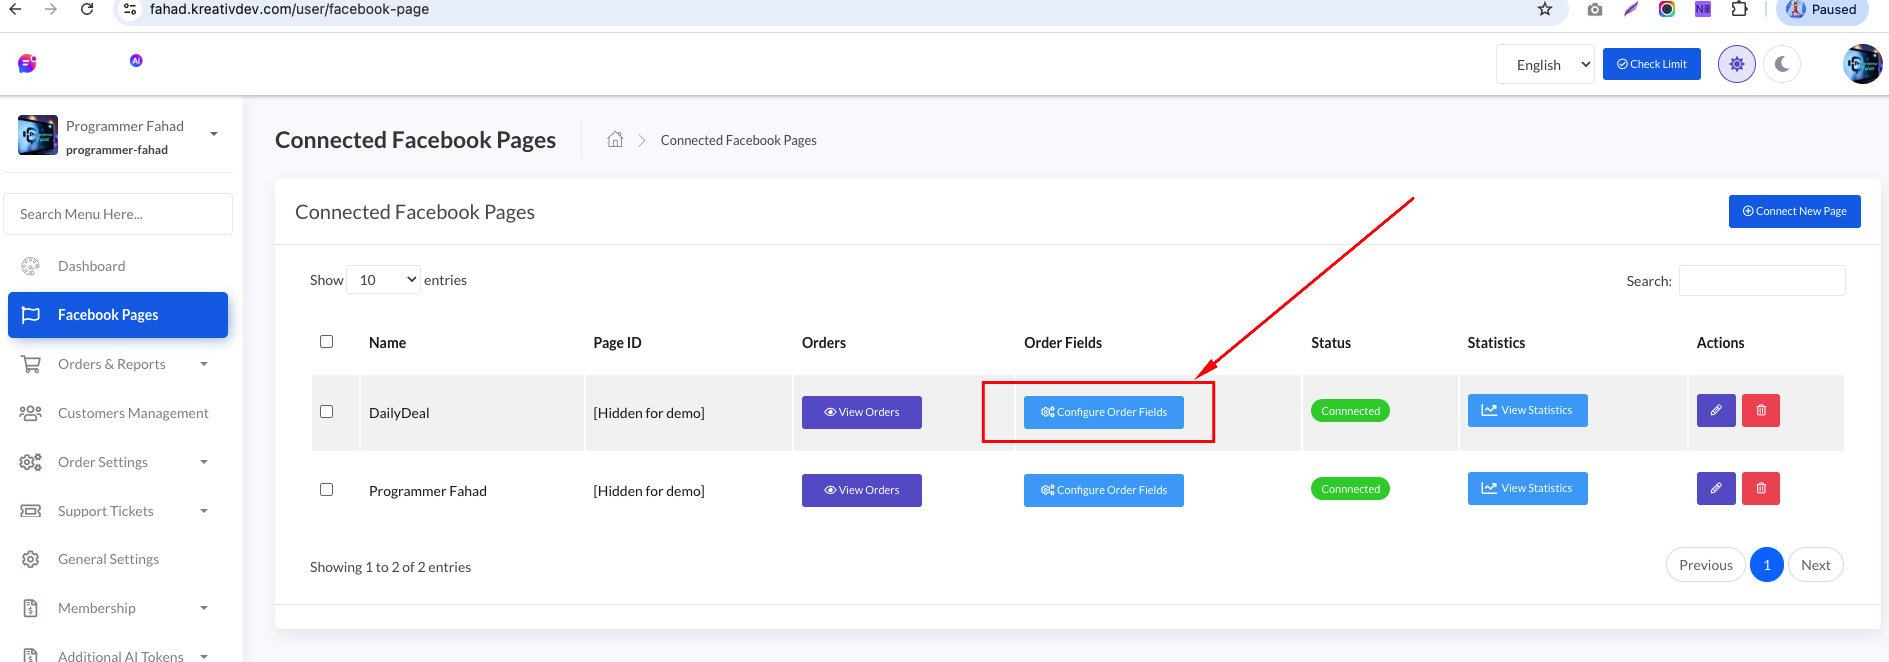
Then, they can add product attributes using this form (highlighted in red in the screenshot below).
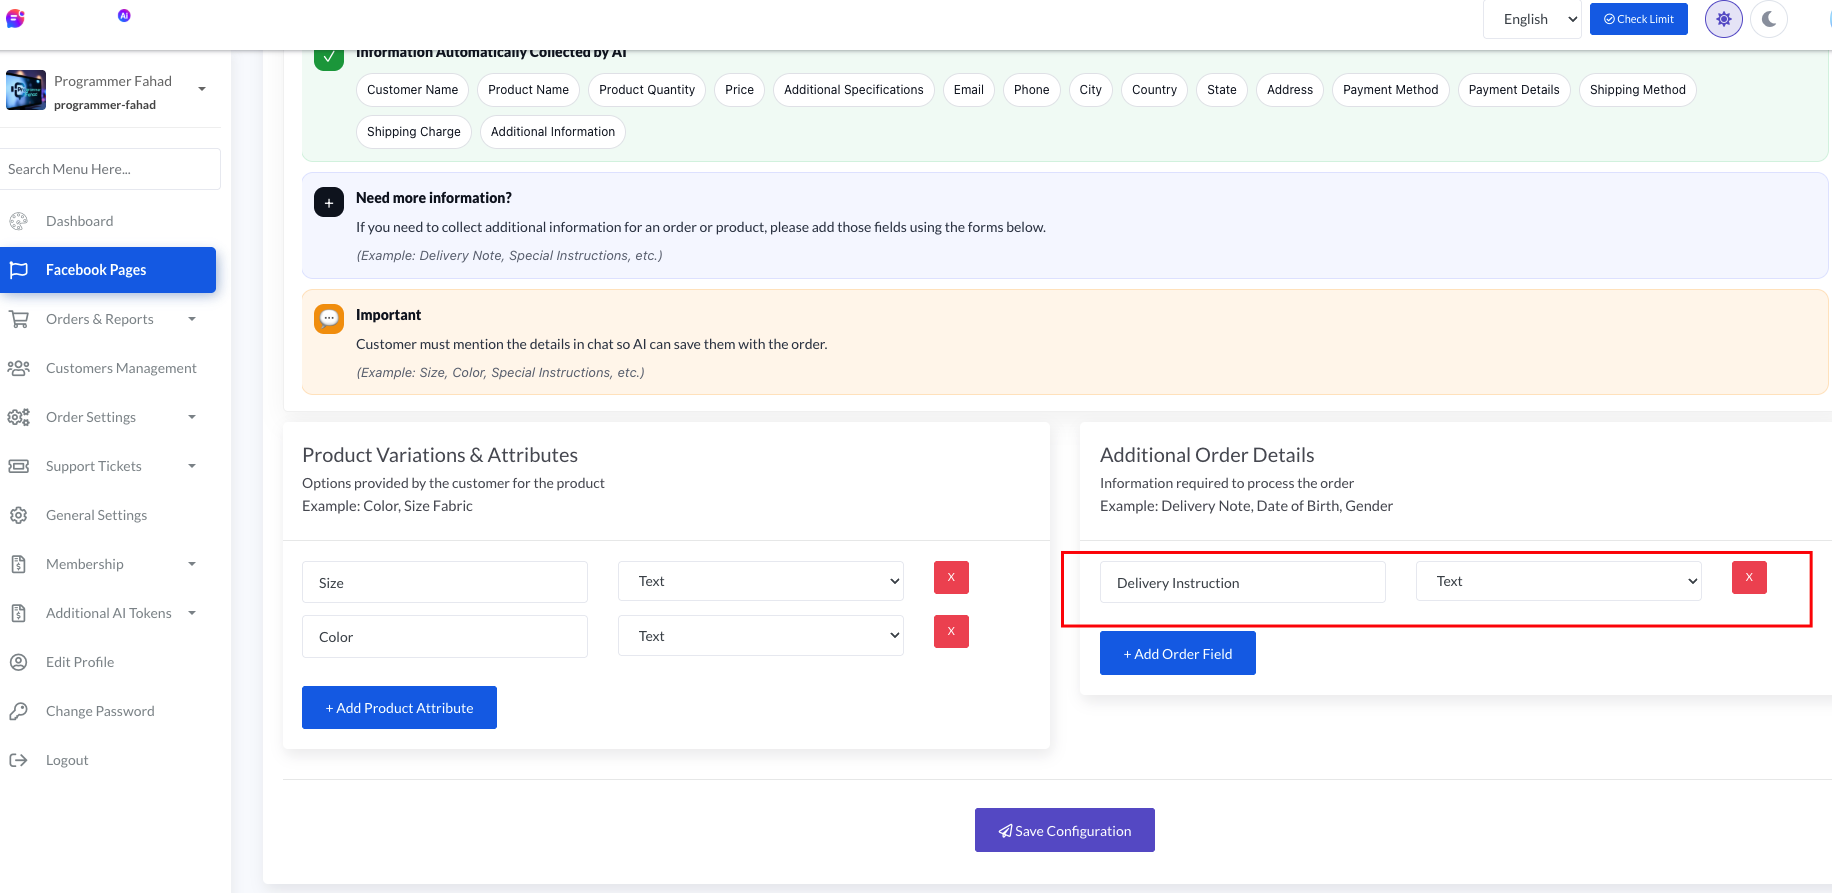
Additionally, if the user wants the AI to collect more order details beyond these (https://prnt.sc/tcKLHx93N65a), they can add those additional order details by clicking the
Configure Order Fields button on the
Facebook Pages page.
Then, they can add the additional order details using this form (highlighted in red in the screenshot below).
Step 4: Set Up Trigger Keywords:
In the "Order Settings" menu, there is a submenu called "Trigger Keywords." Here, a user (the Facebook page owner) can set specific trigger keywords.
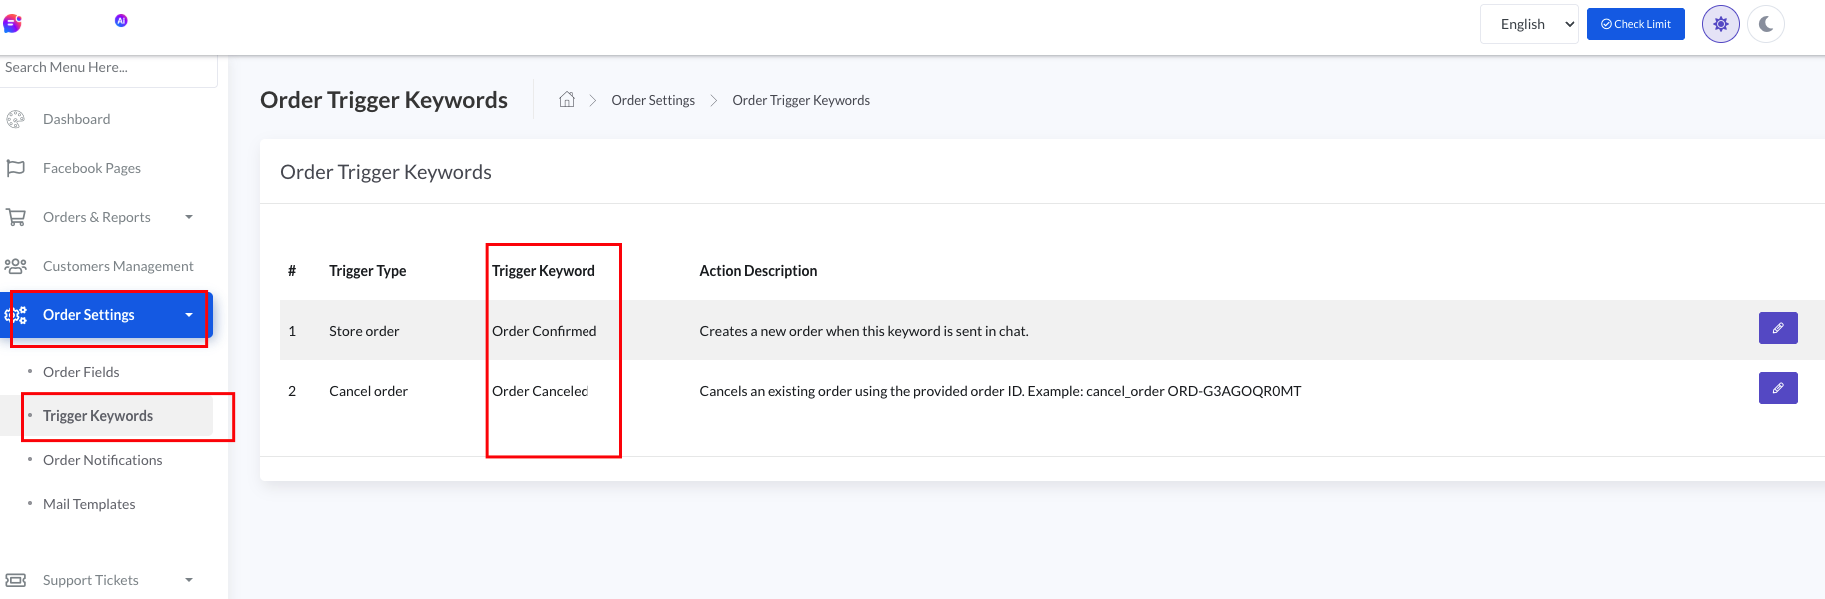
this system, users can set two types of trigger keywords: one for storing an order and another for canceling an order. They can customize these keywords to anything they prefer. For example, to store an order, they might choose a trigger keyword like "Order Confirmed." For canceling an order, they might set a trigger keyword like "Cancel Order #123" or any other phrase they find suitable. Once these custom keywords are used in a chat, the system will either store or cancel the order accordingly.
These keywords determine what happens when they are used. If Facebook page owner writes 'Order Confirmed' (this keyword can be anything set by user) trigger keyword in messenger conversation with customer, the our system will detect this in the chat & AI will start to parse the order details, and store the order in the system. On the other hand, if the user sets a trigger keyword for canceling an order (such as "Order Cancelled #order_no"), when that keyword is used in the chat, the system will cancel that order. In short, one keyword lets the AI store orders, and another lets the system cancel them—based on the user’s chosen triggers.
Step 5: Order Confirmation Notification:
In the MessOrder AI system, the Facebook page business owner can set up an order confirmation notification. This notification is sent to the customer on Messenger after the order is successfully stored in the system. The notification content is exactly what is configured in the "Order Notifications" page.
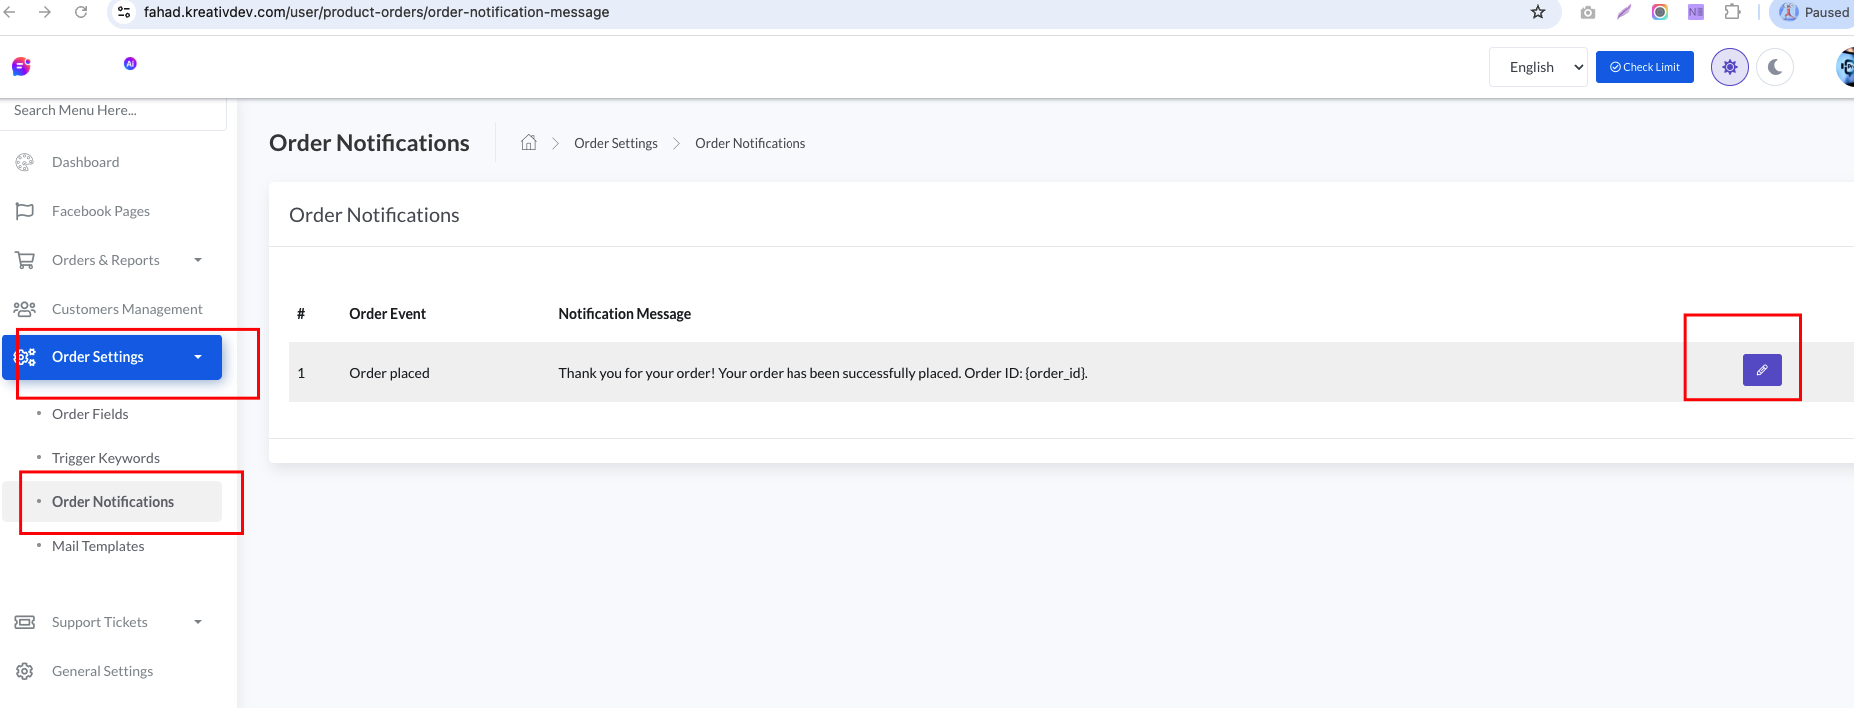
To set the notification message, the user needs to go to the "Order Settings" menu and then select the "Order Notifications" submenu. From there, the user can define the message that will be sent to customers after order confirmation.
Now the Facebook business owner is ready to go. They have already connected their Facebook page to the MessOrder AI user dashboard, published their app in the Facebook Developer account, set trigger keywords, set order notification message in the MessOrder AI dashboard.
When a customer messages the Facebook page to place an order, the business owner chats with the customer to collect all required order details. Once everything is confirmed, the business owner simply types the configured trigger keyword (for example, “Order Confirmed”) in the Messenger chat.
After the trigger keyword is sent, the Facebook webhook is activated. The complete Messenger conversation between the customer and the Facebook page owner is then sent to the MessOrder AI system. The AI scans the conversation, extracts the order details, and stores the order in the dashboard within 1–2 minutes. As soon as the order is stored, a notification is automatically sent to the customer's Messenger conversation.
If any order information is parsed incorrectly, the business owner can manually edit the order from the dashboard. Based on the stored orders, the MessOrder AI dashboard also provides sales reports, analytics, and statistics.